We began with a blank color wheel on the easel. The students helped me out by recalling previous experiments to know where the colors go on the wheel. We labeled the primary colors with a numbers (1, 2, 3) and the secondary colors with a dash (--) mark.
The students were thrilled to see the Play-Dough I made the previous evening. (I will post the recipe at the end of the post for anyone interested.) We looked at the color wheel and recalled upon previous experiments and experiences to remember what colors we needed to mix. I tried mixing small amounts of Play-Dough, which is what you see me sticking to the board in the picture below.
Each student was given two colors of play-dough. They mixed the play-dough until they had the perfect secondary color.
The students pressed, kneaded, and smashed the two colors together to make a new color.
When all the colors were represented, we pressed the Play-Dough onto a piece of paper to make a Play-Dough color wheel.
I took the color wheel home, baked in the oven for 20
minutes at 250 degree. I added a coat of clear sealer, and we can now have it in our classroom as a document of our color investigations.
The second color
wheel needed first to be painted.
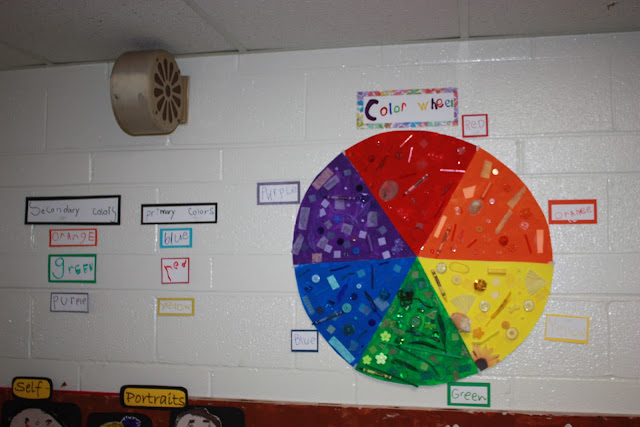
Once the students finished painting all the
pieces of the wheel, we began to add things that we found that matched
the color of the wheel.
Take a look at our beautiful color wheel.
Finally the students helped to label the Primary Colors and the Secondary Colors.
Our color wheel is in the hallway documenting our study on primary and secondary colors.
We learned so much about colors. The students have been noticing the beautiful colors of leaves so I think our next study will be Fall!
Homemade Play-Dough
Materials:
- 1 cup flour
- 1 cup water
- 2 teaspoons cream of tartar
- 1/3 cup salt
- 1 tablespoon vegetable oil
- food coloring
Visit this blog to see step by step instructions on how to make it!
I hope you all had a wonderful weekend!
Mrs. Atkin


No comments:
Post a Comment